Sunday, June 29, 2008

Whole Wheat Chocolate Chip Cookies


I am trying to use whole wheat flour more and more so when I saw this recipe for Whole Wheat Chocolate Chip cookies over at Serious Eats, I was immediately on board.

Using whole wheat flour certainly didn't take anything away from the cookie. They were soft and chewy and disappeared from the cupboard just as quickly as any regular cookie.

The only thing I have changed from the original recipe is adding an extra cup of chocolate chips... I like my cookies chocolatey!

INGREDIENTS

3/4 c. unsalted butter
1 c. sugar
1 c. brown sugar
1 1/2 tsp. vanilla
2 eggs
2 c. whole wheat flour
1 c. flour
3/4 tsp. baking soda
1 tsp. salt
2 c. chocolate chips


DIRECTIONS

1. Preheat oven to 375 degrees.

2. Cream butter and sugars until light and fluffy. Mix in vanilla and eggs.

3. Whisk together flours, baking soda, and salt. Gradually stir flour mixture into butter mixture and then fold in chocolate chips.

4. Drop onto a greased or lined cookie sheet and bake 8-10 minutes. Allow cookies to cool for 5 minutes before removing to a wire rack to cool completely.


Sunday, June 8, 2008

Grilled Pizza

I finally got around to trying pizza on the grill. I've seen pictures and articles and recipes in the past but never had the time or guts... okay, guts... to try it myself.


This article is the one that finally inspired me enough to try it myself (seen on Serious Eats).

I'm not going to pretend that my first bash at grilled pizza was perfect (see that burnt pizza in the background?). As Adam mentions, it isn't difficult but it does take some practice, mostly because it is fast-paced. This is not to be tried by the slow or shy. You need to get in there and do things quickly. How quickly? In about 3 minutes, the pizza is coming off the grill.

I'm not going to put all of their steps here... you can easily click your way over there and read their how-to and tips... but here is what I learned my first go around:

  • MEDIUM heat. Hubby had the grill at high and it cooked way too fast (see that burnt pizza in the background?).

  • After you put the dough on the grill, immediately brush it with oil because it does not take long to need flipping (1-1.5 minutes).

  • Have all ingredients prepped and sitting by the grill, ready to go.

  • Don't use too many toppings. I know us North Americans are used to loading the ingredients 2 inches high... resist the urge. It takes too long. Focus on two or three, maybe four, flavors.

  • Doing this with two people helps a LOT. They are not kidding when they say "top it like the devil himself is chasing your ass". The quicker your toppings are on, the quicker you can close the lid on the grill and let them warm/melt.

The result reminded me of eating in that italian restaurant a few years ago that served us wood-fired pizza. It wasn't quite the same but it was certainly closer than baking it in a traditional oven.

I'll definitely go back to this and try it again.


Friday, June 6, 2008

Spinach & Goat's Cheese Risotto

Mmm ... creamy risotto.


This particular risotto recipe comes from the Cook with Jamie cookbook. I found an adaptation of it on the Simply Recipes site so consulted my copy of the book and ended up somewhere in between the two.

The result was definitely worth it. The spinach and lemon gave it a fresh taste, while the parmesan and goat's cheese made it extra creamy. Hubby and I felt the goat's cheese may have been an overwhelming flavor in the dish, even though I only used about half of what Jamie's recipe called for. I'm looking forward to giving the leftovers a second try though.


INGREDIENTS

1 Tbsp olive oil
4 Tbsp butter
1 medium onion, finely chopped
2 cups Arborio rice
3/4 cup white wine
4 cups vegetable stock
2 cloves garic, peeled and finely chopped
nutmeg
5 1/2 oz. spinach, washed and dried
2 handfuls Parmesan cheese plus extra for garnish
lemon juice
4 oz. goat cheese

DIRECTIONS

1. In a heavy saucepan, heat the olive oil and melt 1 Tbsp butter over gentle heat. Add the onion and 1 clove of garlic; cook gently until soft and sweet but not browned, about 10 minutes.

2. Meanwhile, melt 1 Tbsp butter in a saucepan with a splash of olive oil, a good grating (or pinch) of nutmeg, and the second clove of garlic. When the garlic has melted, add the spinach. Cook for 5 minutes, until wilted down. Allow to cool slightly and puree in a food processor (or chop finely by hand). Season with salt and pepper to taste.

3. Add the rice to the onion and raise the heat to medium-high. Toast the rice, stirring constantly, until the rice starts to look translucent.


Add the wine and stir until absorbed. Add about one cup of the stock to the rice; stirring constantly, cook until most of the stock has bveen absorbed. Continue by adding stock to the rice a ladle at a time, stirring, until the rice is cooked and tastes smooth (you may not need all of the stock).

4. Turn off the heat. Add the remaining 2 Tbsp butter, Parmesan, and spinach mixture. Add 2 or 3 tablespoons of lemon juice (or a good squeeze of a fresh lemon). Let the risotto rest for a minute before folding in the goat's cheese, reserving some to crumble on top when serving.


Sunday, June 1, 2008

Spinach and Orzo Salad

I am a sucker for a pasta salad, especially during the summer.


When this Spinach and Orzo Salad was posted at Simply Recipes, I was all over it. The ingredients are simple but create a Greek-style pasta salad that is unlike any salad I have made.

The first time I made this salad I stuck to the original recipe. Olives and feta are always a good combination and I love the fresh taste of the spinach. I have not used pine nuts much but I love the mild nutty flavor and slight crunch they add to this salad.

This past weekend we had houseguests and I wanted to prepare this fancy salad. I knew they may not be as appreciative of black olives as I am so improvisation was a must. I decided to roast a couple of red peppers and substituted for the olives and the result was fantastic (pictured). The guests raved and insisted that I share the recipe.

I think this recipe has flexibility and a lot of room for experimentation and I intend to play with it.


INGREDIENTS
8 oz. orzo pasta
Salt
1/4 c. pine nuts
6 oz. feta cheese, roughly crumbled
2 oz. Kalamata olives, pitted, and roughly chopped
4 oz. baby spinach
1/2 c. red onion, chopped
3 tbsp. olive oil
1 tbsp. balsamic vinegar
1 tbsp. red wine vinegar
1 tsp. Dijon mustard
Pinch dried basil
Pinch dried tarragon
Salt and freshly ground black pepper, to taste

DIRECTIONS

1. Prepare the orzo pasta according to instructions on the box for al dente. Drain and rinse with cold water to cool quickly.
2. Toast the pine nuts. Heat a small skillet on medium heat. Add the pine nuts and stir occasionally until nuts are lightly browned. Be careful: they will burn if you are not watching them closely.
3. Process half of the spinach in a food processor or blender. Add one tablespoon of the olive oil. In a large serving bowl mix the spinach puree with the cooked orzo until the pasta is well coated. Roughly chop the rest of the spinach and gently mix with orzo along with red onion, feta cheese, pine nuts, and olives.
4. Combine the remaining 2 Tbsp olive oil, balsamic vinegar, red wine vinegar, mustard, basil, and tarragon in a small jar (with a whisk) or bowl (by shaking). Pour over orzo spinach mixture and gently mix until well incorporated.
5. Chill for one hour before serving.


Wednesday, March 19, 2008

Broccoli and Cauliflower Gratin with Smoked Gouda

There was a lot of vegetable tray leftover after a bonspiel at the curling club. All of a sudden I had a lot of cauliflower and broccoli hanging out in my fridge and was needing something to do with it.

At the same time, I was wondering what to do with a nice chunk of smoked gouda that I had picked up at the market a few days before.


Enter my first friend: Google. A search for "broccoli cauliflower gouda" produced my second friend: Christine Cushing. I used to watch her show quite often on the Food Network and really enjoyed her television personality and, more importantly, her recipes.

She certainly saved me this time. The smokiness of the gouda complimented the cauliflower and broccoli so well. I love that it is melted into the Bechamel and browned on the top. Add a little parmesan and sun dried tomato and I am in gratin heaven.


This is a quick gratin so was easy to make on a weeknight after work. A word of advice: This is definitely one of those recipes where it helps to prepare many of the ingredients ahead of time. The Bechamel needs attention which makes it difficult to prepare the other ingredients.

INGREDIENTS

Bechamel Sauce
3 tbsp. butter
4 tbsp. flour
2 1/4 c. milk (I used skim)
Pinch of grated nutmet
Salt and freshly cracked black pepper
1 c. grated smoked gouda cheese
2 tbsp. Parmesan cheese, grated

3 cups broccoli florets
3 cups cauliflower florets
12 button mushrooms, sliced in half
Coarse salt and freshly cracked black pepper, to taste
5 sun dried tomatoes, finely chopped
1 tsp. dried Greek oregano
2 garlic cloves, finely chopped
2 tbsp. chopped fresh parsley
2 tbsp. chopped fresh basil

Topping
1/4 c. bread crumbs
1/2 c. smoked gouda, grated
2 tbsp. grated Parmesan cheese


DIRECTIONS


For Bechamel sauce...

1. In a medium saucepan, melt butter on medium heat. Add the flour and stir with a wooden spoon to combine.

2. Remove pan from heat and in a steady stream whisk in cold milk. Stir well until smooth. Return to medium heat and stir until thick and sauce begins to boil.

3. Season the sauce with nutmeg, salt, and pepper. Remove from heat. Stir in 1 cup grated smoked gouda and 2 tbsp. grated Parmesan cheese.


Meanwhile...

1. Blanch broccoli and cauliflower florets in boiling water until tender. Drain well. Meanwhile, sautee mushrooms until slightly soft. Put broccoli, cauliflower, and mushrooms in a large bowl.

2. Add sun dried tomatoes, oregano, garlic, and half each of the parsley and basil. Season the mixture with salt and pepper. Toss until well combined.

3. Pour the smoked gouda bechamel sauce over vegetables. Transfer to a baking dish.

4. Cover with foil. Bake in a 400 degree oven until hot and bubbling, about 15 minutes. Remove foil and sprinkle with grated gouda, bread crumbs, and the Parmesan cheese. Turn broiler on and place under broiler until top is golden brown and bubbly, about 2 minutes.

5. Garnish with remaining parsley and basil.


Sun Dried Tomato Basil Couscous

I got a craving for couscous one night last week and knew that there was an unopened box of it in my pantry. It has been sitting there for months because couscous is just not one of those things that you see Carleton County dwellers making very often. I've eaten it a few times before, prepared a few different ways (and isn't that the beauty of couscous?), and really liked it a few times. Plus it's really easy to incorporate into a lifestyle that is about eating healthier.

Couscous is not a grain; it is pasta made of tiny pieces of dough that are steamed. It comes from and is a staple throughout North Africa. It can be used for everything from breakfast to dessert, making it very versatile. I'm sure there are hundreds, maybe thousands, of different recipes online.

This particular day I was searching for a couscous recipe using sun dried tomatoes to go with a Broccoli and Cauliflower Gratin recipe with the same ingredient. The recipe combined the tomatoes with basil, a tried and true combination, and onion. It worked very well.

INGREDIENTS

2 c. vegetable broth (or chicken, if desired)
1/4 tsp. dried garlic powder
1 x 5.6-oz box 5-minute plain couscous
1/2 c. oil-packed sun dried tomatoes, drained and diced
1/4 c. green onions, tops included, sliced
2 Tbsp. fresh basil, minced
2 Tbsp. sun dried tomato vinaigrette
Salt and freshly ground black pepper to taste

DIRECTIONS

1. Stir garlic powder into the broth.

2. Prepare couscous according to the directions on the box, using the broth mixture instead of water. (Mine called for microwaving the couscous in the broth; others call for adding the couscous to boiling broth and steaming in a covered bowl)

3. Fluff with a fork and gently stir in the sun dried tomatoes, green onions, basil, and sun dried tomato vinaigrette. Season to taste with salt and freshly ground black pepper.

4. Fluff again with a fork and serve hot or at room temperature.

Yield: 4 to 6 servings


Tuesday, March 11, 2008

Whole Wheat Oatmeal Bread (Breadmaker)

We got a breadmaker for Christmas and, ever since, I have been trying different bread recipes. I don't think we've bought a loaf of bread since Christmas. I started with the book that came with the maker and they seemed to come out okay... or so I thought.

I decided to look online for recipes and found a couple that knock the others out of the running.

We are trying to eat healthy so I have been focusing on just whole wheat recipes. This particular one is really just a plain whole wheat bread but with oatmeal in it. I modified the recipe to include vital wheat gluten which, I have read, makes whole wheat bread rise better. I couldn't be happier with this recipe.


INGREDIENTS

1 1/4 c. warm water (70-80 degrees F)
2 tbsp butter or margarine, softened
2 tbsp honey
1 1/4 tsp salt
2 tbsp skim milk powder
1 1/2 c. bread flour
1 c. whole wheat flour
1/4 c. vital wheat gluten
1/3 c. quick-cooking oats
1 1/4 tsp active dry yeast


DIRECTIONS


Place all ingredients in the bread machine pan, in the order suggested by the manufacturer (these are in the order I add them).

Select loaf size and crust color. This recipe makes a 1 lb. loaf and I usually use the light crust.


By the way, if you wondered what bread I used to make the portobello panini, this is it.

Sunday, March 9, 2008

Portobello Pesto Panini

Meet my new favorite sandwich:


I figure a panini is an adult version of a grilled cheese (or at least mine are because they always involve cheese). A panini press grills a sandwich nicely, without needing butter on the bread as you would with a grilled cheese.

This panini stars sauteed portabella mushrooms and caramelized onions. The onions lend a sweetness that meshes perfectly with the basil pesto spread on the bread.

DIRECTIONS

First, caramelize half of a yellow onion by sauteeing in olive oil over medium-low heat.

Meanwhile, take the stem out of one portabella mushroom and slice in 1/4-inch slices. Sautee over medium heat. (I like to use a little balsamic vinaigrette instead of just olive oil while sauteeing the mushrooms but it's not necessary).

When the onions and mushrooms are ready, spread one slice of bread with mayonnaise. Spread the other with basil pesto. Slice mozzarella cheese on one slice of bread. Top with portabella mushrooms and then onions.

Put the sandwich in a panini press until golden and cheese is melted.


Tuesday, March 4, 2008

Portobello Mushroom Lasagna with Spinach and Feta

I don't think I have ever made the same lasagna twice; I figure the day I say I have one lasagna recipe in my repertoire is the day I stop having fun in the kitchen. Lasagnas are so varied, so versatile, so "kitchen sink".

I am loving portabello mushrooms lately (they have a meaty texture so, for a vegetarian, they are an easy way to "beef up" a dish) so last week I went looking for a lasagna recipe using them. I found this lasagna recipe with spinach (mmm ... iron!) and feta cheese where portabellos actually make up a layer of the recipe.

I actually think this recipe would be really good with some ricotta cheese added to the cheese & egg mixture so I might just try that next time.

Admittedly, I was pretty pressed for time the evening I made this so I modified the original recipe to use prepared pasta sauce. I know, it's borderline blasphemy, but this is my busy time of year ... so sue me. I used Classico Sundried Tomato sauce.


INGREDIENTS


9-10 lasagna noodles, uncooked

1-1 1/2 24-oz jars of pasta sauce of your choice (I used 1 1/2 jars but I seem to like my lasagna a little saucier than recipes call for)

2 c. mozzarella cheese, shredded

1 c. feta cheese, crumbled (more, if desired)

1 10-oz package frozen chopped spinach, thawed and squeezed dry

1 egg, slightly beaten

4 portabello mushrooms, cut into 1/4-inch thick slices

DIRECTIONS

1. Preheat oven to 350 degrees. Grease a 9 x 13-inch baking dish.

2. Cook the lasagna noodles until soft.

3. Meanwhile, stir together 1 1/2 cups mozzarella cheese, feta cheese, spinach, and the egg in a medium bowl.

4. Now assemble the lasagna: Spread 1/3 of the sauce on the bottom of the dish, then 3 pieces of lasagna noodles, 1/2 of cheese mixture, 1/2 of sliced mushrooms, then another 1/3 of the sauce. Repeat layers. To finish, top with remaining pasta, the balance of the sauce, and the remaining mozzarella.

5. Cover with foil; bake for 25 minutes. Uncover and bake for 5-7 minutes longer or until the cheese melts and is slightly browned.

Thursday, February 28, 2008

Bowls made out of ... what?!

Bacon lovers rejoice! Are you settling for normal, boring, tired bowls? No more!

Use a bacon bowl!... yes, you heard me right! Bowls made out of bacon!

My vegetarian and creative particles are at odds ... I wonder what bacon insanity will befall us next but then again, these look cool, they serve a purpose and, despite the fact that they are bacon, they look really elegant. I'll never eat one but they're damn clever! I can dig it and maybe, just maybe, I'll have to try making them.

These come from not martha. And just like *that*, she's in my blog favorites list. She has to be with a blog name that clever.

Espresso Crepes with Dark Chocolate Sauce

I found this recipe on MyRecipes.com, a site I will be checking in on more frequently. They have a lot of neat recipes and cooking tips. I also love the themed calendars and series.

This is a dessert for the coffee lover in all of us: Espresso Crepes with Ice Cream and Dark Chocolate Sauce.


The crepes can (and should) be made ahead of time so they are allowed to cool. To cook the crepes, I used an 8-inch skillet and it worked fine. I don't have a crepe pan and would use it so infrequently that I don't want to give up the real estate in my kitchen for one (even though, admittedly, it wouldn't take up much room).


INGREDIENTS

For the crepes

1 c. all-purpose flour
2 tsp. sugar
2 tsp. instant espresso powder
1/4 tsp. salt
1 c. low-fat milk (I used skim)
1/2 c. water
2 tsp. butter, melted
2 large eggs


For the chocolate sauce

1/3 c. half-and-half
2 tbsp. honey
3 oz. semisweet chocolate, chopped


2 cups low-fat coffee ice cream (or frozen yogurt)


DIRECTIONS

Crepes

Lightly spoon flour into a dry measuring cup and level with a knife. Combine flour, sugar, espresso powder, and salt in a small bowl.

Combine milk, water, melted butter, and eggs in a blender. Add the flour mixture to milk mixture, and process until smooth.

Cover batter; chill for 1 hour.

Heat an 8-inch nonstick crepe pan or skillet over medium heat. Pour a scant 1/4 cup batter into pan; quickly tilt the pan in all directions so batter covers the pan with a thin film. Cook about 1 minute. Carefully lift the edge and turn when the crepe can is lightly browned and can be shaken loose. Cook another 30 seconds or until center is set.

Place crepe on a towl; cool completely. Repeat with remaining batter; makes about 13 crepes.


Chocolate sauce

Combine half-and-half and honey in a small saucepan over medium heat; cook 3 minutes or until tiny bubbles form around the edge of the pan, stirring frequently (do not boil). Remove from heat. Add chocolate; stir until smooth. (Note: As you can tell from the pics, my sauce wasn't all that thin. Maybe a little more cream would have done the trick?).

Fold each crepe in half; fold in half again. Place 1 crepe on each of 8 plates. Top each serving with 1/4 cup coffee ice cream; drizzle with 4 teaspoons sauce.

(Check out that scoop action!)

Nutritional Info

Serving Size = 1 crepe, 4 tsp. chocolate sauce, 1/4 c. low-fat ice cream

Calories: 229 (28% from fat); Fat: 7.1 g; Protein: 6.2 g; Cholesterol: 45 mg; Calcium: 93 mg: Sodium: 105 mg; Fiber: 0.8 g; Iron: 0.6 mg; Carbohydrate: 25.5 g

(Obviously this is a guideline only, as actual content would differ depending on the type of ice cream used, substitutions made, etc)

Wednesday, February 20, 2008

Is Pac Man cheesy?


From Serious Eats, a shot of Pac Man in Cheese, brought to us by John Watson.
Kind of makes you think... would you rather be Pac Man or the ghost?!

Tuesday, February 19, 2008

I Love You and You Love Meat

People will fairly often say to Hubby, "So, uh... are you pretty much vegetarian since, uh, since she's vegetarian?".

This is usually said awkwardly, hushed, and with quick side glances in my direction. It's kind of like they're talking to someone that's been kidnapped and they're quietly trying to probe him for a sign that he's being held against his will, without alerting me.

I am not feeding Hubby against his will.

I came across this article, I Love You, but You Love Meat, on the NY Times site around Valentine's Day and it got me thinking about our culinary/diet relationship.

Admittedly, I don't know a lot about cooking meat but Hubby will back me up when I say that I have been trying harder recently. I really do want to learn how to cook meat but I do still need a little guidance. I don't mind the smell of it (mostly - bacon stinks) and I don't mind handling it (mostly).

No, the biggest "beef" I have about cooking meat, especially a new dish, is that I have to take his word on whether it is good or not! Can I always trust that he is being honest when something isn't quite right? You would think yes but I would think that it depends on what he wants that particular day... *wink*wink*, nudge, nudge.

Hubby will often roast a chicken or make a meatloaf on Sunday afternoon and inject it into meals throughout the week. When we make pizza we make one for him and one for me. It doesn't bother me in the slightest and it doesn't seem to bother him to do it this way either.

Thankfully we are both adventurous eaters and enjoy trying new things. The only difference is that my adventurous category does not include flesh. Hubby admits that he was not always this adventurous and that dining with a vegetarian has increased his appreciation for many vegetables. And knowing that he enjoys trying new things spurs me on to new recipes and culinary adventures.

Contrary to popular belief, it is not a burden for him to eat vegetables. Also contrary to popular belief, you do not need meat at every meal. No, you don't.

With all that said, I'm not likely to jump to kiss him while he's got a mouth full of chicken but I'm not going to force him to brush his teeth before I do either.

And I would never ask him to give it up.

Wednesday, February 13, 2008

Sweet Hot Tofu


I am buying tofu at least every other week now. I really like tofu but I have never got past frying or baking it. I really want to branch out and try it in other forms because it is such a versatile product.

This is another tofu recipe that I made just tonight. Again it starts with frying the tofu. It then tosses it in a great sauce that is sweet and sour sauce with a kick (I love the flavor of Hoisin sauce). It was nice and sweet, but I would turn up the "hot" a little bit on the next run. Maybe two dashes of crushed peppers.

This sauce would make a really nice stirfry sauce too. Just saute some veggies with the tofu and then toss everything with the sauce. Hmm... that sounds like supper tomorrow night.

INGREDIENTS

2 tsp. canola oil
1 14-oz package firm tofu, cut into 1-inch cubes

2/3 cup vegetable broth
1/4 cup hoisin sauce
1 tbsp red wine vinegar
1 tsp cornstarch
2 tsp soy sauce
1 tsp honey
1/2 tsp sesame oil
Dash of crushed red pepper
2 tsp minced ginger
2 tsp minced garlic
1/3 cup green onions, thinly sliced


DIRECTIONS

Press the tofu to remove excess water.

Combine broth and next 7 ingredients (including pepper) and whisk well. Set aside.

Heat canola oil in a large skillet over medium-high heat. Add tofu; cook until lightly browned. Remove from skillet.

Put ginger, garlic, and onion into the same skillet; saute 30 seconds. Stir in broth mixture; cook 1 minute or until sauce is thickened slightly. Add tofu and cook 30 seconds, stirring gently to coat the tofu.

Makes 4 servings (1/2 cup each)


Monday, February 11, 2008

Lentil Soup


For a long time I went without eating soup, chowder being an exception.

I think I was somehow stuck in the land where soup is the shape of a can, has a jelly-like texture, and drops into the pot with a sickening, gooey sucking sound, followed by a *plop*. You add water or milk and hope that you can whisk with enough fury to avoid the lumps that were, more often than not, unavoidable in the first place. The soup might have pasta shaped like letters or noodles that looked (and tasted) like matchsticks. Although it has been a long time since I've eaten meat, I can still remember that chewy, rubbery texture of the "chicken" in Chicken Noodle Soup.

Have you noticed the soup section at the supermarket lately? Tuscan Bean Soup, Roasted Red Pepper and Tomato, Cream of Carrot... the selection has certainly gone beyond the Chicken Noodle and Cream of Mushroom of my childhood.

Lately, though, Hubby and I have been trying homemade soups on for size. There is nothing quite as satisfying or comforting as a piping hot bowl of homemade soup. Add a dollop of sour cream and bread for dipping and you're even closer to perfection.

Just last week I spied my little eye on lentils at the supermarket and figured they would be the perfect "meat" to bulk up a vegetarian soup. I always use vegetable stock, although I'm sure any type of stock would taste fine.

The cumin in this soup makes it reminiscent of chili... thick and hearty and the perfect thing to warm the belly on a cold Canadian winter day.

INGREDIENTS

1-2 tbsp. olive oil
2 cups lentils, uncooked
8 cups vegetable stock or water (if water is used, add 1 veg. bouillon cube)
1 med. yellow onion, chopped
2 small carrots, thickly sliced
1 rib celery, chopped
1 large potato, peeled and cut into large cubes
2 bay leaves
1 tsp. coriander seed, crushed
1/2 tsp. cumin
Freshly ground pepper, to taste

2 cloves garlic, minced
2-4 oz. fresh spinach, chopped if leaves are large
2 tsp. red wine vinegar
Salt, to taste

DIRECTIONS

Heat olive oil in a large pot. Add onion and cook 3-5 minutes or until onion are soft.

Add lentils, stock, carrot, celery, potato, bay leaves, coriander, cumin, and pepper. Simmer for about 30 minutes, or until lentils are tender.

Add garlic, salt, and spinach. Taste for seasoning; add coriander or cumin to taste. Simmer for another few minutes or until spinach is wilted.

Stir in red wine vinegar. Serve.

Makes 6 servings.


Friday, February 8, 2008

Baked Brie with Mushrooms

I adore the creaminess of Brie cheese. Just spread on a cracker, it has a deliciously mild flavor and smooth texture.

A couple of years ago, at a party, someone made phyllo-wrapped brie as an appetizer and I instantly loved the idea. For this year's Christmas party, I searched for a recipe that might satisfy the masses.

A lot of recipes, especially holiday recipes, combine Brie cheese with cranberries. That is a wonderful combination, don't get me wrong, but I was searching for something a little more savory. I came across this recipe for Baked Brie with Mushrooms.

The original recipe called for phyllo pastry but I happened to have a sheet of puff pastry left over from another occasion so I used it instead. The result is the same, except the pastry around the outside is a little ... well, puffier.

INGREDIENTS

1 cup mushrooms, sliced
1 green onion, chopped
2 Tbsp. Balsamic Vinaigrette Dressing
4 sheets frozen phyllo, thawed (or 1 sheet puff pastry, thawed)
2 Tbsp. margarine, melted
1 pkg. Brie cheese

DIRECTIONS

Preheat oven to 400 degrees.

Saute mushrooms and onion in dressing in frying pan until tender. Set aside to cool.

Brush one sheet of phyllo lightly with melted butter. Cover with remaining 3 phyllo sheets, brushing each layer with butter. Cut a circle from the stack that is big enough to wrap around the Brie (discard trimmings).

- OR -

Brush sheet of puff pastry with melted butter. Cut a circle from the stack that is big enough to wrap around the Brie (discard trimmings).

Cut Brie in half horizontally. Place one half of cheese in center of pastry; top with half of the mushroom mixture. Top with other half of cheese and remaining mushrooms. Wrap pastry around cheese, folding it as needed to completely enclose the cheese. Brush the top with the remaining butter. Place on a baking sheet or pie plate.

Bake 15 minutes or until golden brown. Serve immediately with crackers.

Nutritional Info
Serving Size = 2 Tbsp
Calories: 131; Total fat: 9.5 g; Saturated fat; 4.8 g; Cholesterol: 25 mg; Sodium: 225 mg; Carbohydrate: 7.2 g; Protein: 4.3 g; Vitamin A: 6% DV; Calcium: 3% DV; Iron: 4% DV

Wednesday, February 6, 2008

Chili and Cornbread

It's taken me a few days to post about our Superbowl snacks... I guess I wanted to wait for the wounds to heal just enough so that mentioning the Giants win would reopen them. Salt? Yeah, that too...

Over it yet? Okay, let's move on...

Chili, specifically this Spicy Vegetarian Chili from Simply Recipes. This chili has just the right amount of spiciness but can easily be adjusted to your taste.

The only change I made was a substitution for the eggplant. Instead of roasted eggplant, I used about six grilled portabellini mushrooms that were cut into 1/2-inch cubes. I love these mushrooms and since this chili isn't real juicy, having these little juicy bites of mushroom added a lot to the flavor. Scrumptious!

To go with the chili, I made a Chili Polenta Cake (or Chili Cornbread) with chopped red peppers and jalapeno peppers. Again, you can use as many jalapeno peppers as you like or none at all really. But then it would just be plain ole cornbread, wouldn't it?

INGREDIENTS

1 1/3 cups all purpose flour
1 1/2 tsp baking powder
1 tsp salt
1 1/4 cups polenta or cornmeal
1 cup cheddar cheese, grated
1 cup light sour cream
1/2 cup skim milk
2 eggs
1/2 cup red pepper, chopped
2 tsp jalapeno pepper, chopped
2 oz butter

DIRECTIONS

1. Preheat oven to 400 degrees.
2. Sift flour, baking powder, and salt into a large bowl. Mix in cornmeal/polenta and cheese.
3. In a separate bowl, whisk sour cream, milk, eggs, red pepper, and jalapeno. Melt butter and stir into sour cream mixture.
4. Pour all liquid ingredients into dry ingredients. Mix well.
5. Pour into greased pan (I used an 8-inch round pan); cook in the oven for 25-30 minutes or until a skewer comes out clean.

Enjoy! (Sorry, no pic...)

Monday, February 4, 2008

The Palate - Fredericton, NB

I am not a food connoisseur by any means so I am in no position to be writing restaurant reviews. I do know good food when I taste it though and think it deserves recognition. So let's not consider this a review, so much as a post about a good meal.

On Tuesday night, Hubby and I went to Fredericton for dinner and the symphony as part of my birthday present. I know... he's such a sweetie.

We had a wonderful dinner at The Palate on Queen street. As a vegetarian, I rarely have to choose from a selection of menu options but their dinner menu is chock full of mouth-watering options that are suitable for herbivores. I had drooled over the menu for at least a week beforehand though, so after only a minimal amount of waffling I knew what I was going to order.

For an appetizer, we shared Caramelized Apple and Walnut Brie: toasted balsamic croutons, fresh apple, and radish in a maple vinaigrette. It is as good as it reads. Hubby has not yet been the biggest fan of brie but really loved this dish. The sweetness of the apple and the slight oniony flavor of the radish, mixed with the creaminess of the brie and the crunch of the croutons... well, need I go on?

For a main course, I had the Artichoke and Tofu Cassoulet, a tomato bean stew full of roasted vegetables, artichoke and tofu. I absolutely love artichokes but I have only ever used the canned variety in dips and have never attempted to use them fresh. Frankly, they're one of those vegetables that you imagine using a hacksaw to get into... slightly intimidating to say the least! I may have to take the plunge though because I adore the texture and the taste of them. Add tofu and spiciness in a tomato sauce and I am in heaven. This dish did not disappoint.

Hubby had the Halibut Puttanesca: Atlantic halibut slowly poached in a Puttanesca-style sauce served over semolina gnocchi and ratatouille. I can only comment on the bit of gnocchi I had that was melt-in-your-mouth goodness. He cleaned his plate which is testimony enough, if you ask me.

Wondering what Puttanesca is? I had never heard of it so I did a little digging. The sauce is tomato-based, with anchovies, capers, and black olives. Pasta Puttanesca is loosely (pun intended) known as "Whore's Pasta", apparently named for the ladies of the night because they would put pots of it in their windows to tempt men into the bordellos and because it was quick and cheap to make.

What a great meal and the service was really good. I am really excited to try brunch there on a Saturday morning.

(By the way, our date continued to the New Brunswick Symphony, which I will comment about on my other blog)

A new idea for cutlery


I don't know what it is about my workplace but there is never a fork in the lunchroom.
I have learned to bring my own but every now and then, on those days when I'm not at my sharpest, I forget. Lunchtime comes, I go to the drawer, and ... nothing. I once ate Mr. Noodles with a spoon. Not a picture of culinary grace, that's for sure.

The solution? Din-Ink: Pen caps that are cutlery! (I assume that is pronounced 'dine-ink'). Straight from Italy, these little marvels won first place in Design Boom's Dining in 2015 design.

They're made from "GM free corn and potato" and are 100% biodegradable and atoxic. Pen chewers rejoice!
Now if only I still used pens with caps on them...

"It's like putting your whole mouth right in the dip!"


With the SuperBowl on the horizon, people everywhere are rifling through the recipe banks in their heads, in search of the perfect appetizers to serve with the game. And of course, a dip of some sort is bound to be on the menu. Everything from a hot cheesy dip to guacamole will be gracing coffee tables worldwide on Sunday evening.

I can hear the crunch of chips now...
But are you going to double dip that chip? Many of us do and don't give it a second thought, but just what is transferred from chip to dip?
A study done by Clemson University has determined that an average of 10,000 bacteria are transferred from the eater's mouth to the remaining dip over three to six double dips. The amount depended on the type of dip; specifically, how thick it was.
The professor in charge of the study says, "The way I would put it is, before you have some dip at a party, look around and ask yourself, would I be willing to kiss everyone here? Because you don't know who might be double dipping, and those who do are sharing their saliva with you."
I don't know about you but ... well ... ewww.

Chocolatey Hazelnut Spread... yummm


Nutella doesn't exactly help my weight loss mission but I had to post about it because it just happens to fall on my birthday! What's better than chocolate for breakfast, you ask? Chocolate for breakfast on your birthday!

February 5th is World Nutella Day! If you have a blog, you can participate in the activities too!

Hot Cheesy Spinach Dip

If there is one thing I love, it's a nice, hot dip. Actually, if I really could have only one thing to love, it wouldn't be dip. But I do love a hot dip just the same!

I have made this cheesy spinach dip a few times and, without fail, it flies out of the dish. This is another recipe that comes from AllRecipes.

There is nothing about this dip that says 'diet' so eat it in moderation. If you are preparing for a party, make things a little easier and prepare this the night ahead so you can just slide it in the oven the day of the party!

Though I haven't strayed too far from the original when I have made it, the submitter suggests there are numerous ways you can improvise to liven it up. I am thinking 'artichokes' for the next go around.

~~~~~~~~~~~~

INGREDIENTS

3 tablespoons butter or margarine

2 cloves garlic, peeled and chopped

1 bunch baby spinach*, rinsed

1/2 cup white wine

salt and pepper to taste

hot sauce to taste

1/2 cup green onion, chopped

3 cups mozzarella cheese, shredded

1/2 cup mayonnaise

1/2 cup half-and-half

DIRECTIONS

1. Preheat oven to 350 degrees. (Obviously, you can skip this if you are preparing it the night before)

2. Melt the butter in a medium saucepan over medium heat. Stir in the garlic, spinach and white wine. Cook and stir 2 to 3 minutes, until spinach is wilted. If you are using frozen spinach, still cook for 2 to 3 minutes so the wine has time to cook off. Mix in salt, pepper, and hot sauce. Remove from heat and transfer to a medium bowl.

3. Mix green onion, mozzarella cheese, mayonnaise, and half-and-half into the bowl with the spinach mixture. Transfer mixture to a medium baking dish.

4. Bake in preheated oven for 20 minutes or until bubbly and lightly browned. Garnish with a little chopped green onion, if desired.

Yield: 6 cups, Servings per recipe: 48, Serving Size: 1/8 cup

~~~~~~~~~~

* A note on the spinach: I have used frozen spinach as well; just be sure to squeeze the water out of it. I have also used regular spinach, which works fine; just be sure to chop it up so you aren't pulling long strands of spinach out of the dip.

Nutritional Info: Servings per recipe: 48; Serving Size: 1/8 cup; Calories 48; Total Fat 4 g; Cholesterol 8 mg; Sodium 60 mg; Total Carbs 0.8 g, Dietary Fiber 0.2 g; Protein 2.1 g

Barbecue Tofu

I really like tofu. It is so good for a vegetarian diet. I'm always looking for new tofu recipes because I enjoy having it in the fridge for snacks or to warm up with a meal. I think a lot of people avoid tofu just because they aren't sure what to do with it. I'm always looking for new tofu recipes.

Tofu is like a sponge. First, it comes packed in water so squeezing the water out of it is usually in order. Otherwise, it is quite mushy. Second, tofu absorbs what you cook it in. Once you realize this, its place in a recipe becomes more clear.

This is one of those recipes where a measuring spoon is really not necessary.

INGREDIENTS

1 pound firm tofu
1 1/2 8-oz can tomato sauce (or about 1 1/2 cup homemade)
2 teaspoons prepared yellow mustard
2 teaspoons vinegar
2 teaspoons soy sauce
1 tablespoon vegetable oil
1 tablespoon molasses
2 tablespoons grated onion
1/2 teaspoon garlic powder
*For extra spice, add a few pinches of cayenne pepper

DIRECTIONS

1. Slice tofu into slices about 1-inch thick. Press slices between 2 pans for 1 hour to squeeze the water out and compress the tofu. (Place something heavy on top of the pans, like cookbooks or cans of food. Prop up one end so the water can drain into the lower end of the pan.)

2. While tofu is draining, combine remaining ingredients. Spoon about 1/3 of the mixture into the bottom of a baking dish that has been lightly oiled or sprayed with nonstick cooking spray.

3. Preheat oven to 350 degrees.

4. Place pressed tofu on sauce. Top with remaining sauce.

5. Bake, uncovered, for 1 hour.

This recipe makes excellent leftovers as a cold sandwich or on its own and heated.

Creamy Leek and Potato Soup


I made Creamy Leek and Potato Soup a couple of nights ago and ... yum. It's not really a 'cream of' soup since the base is mostly stock and the pureed potatoes give it that creamy texture. The little bit of cream that is in it is just for taste.

Whatever you want to call it, it turned out really good. I had never bought leeks before but definitely will again. It was difficult to get a feel on their flavor in this soup so next time the recipe will be more leek-centric. Maybe I'll roast them.
For info on how to clean leeks and how to cook them in just about every way possible, check out this link.
INGREDIENTS
3 tablespoons butter
3 leeks, white and green parts, sliced (wash well)
1 tablespoon minced garlic
7 cups vegetable stock
3 large potatoes, peeled, quartered
1 cup heavy cream
Salt, to taste
Pepper, to taste
Garnish (optional): fresh parsley, soft herbed cheese
DIRECTIONS
1. In a large pot, melt butter over low heat. Add the leeks and cook, stirring often, until tender, about 3 minutes. Add the garlic and cook for 30 seconds.
2. Add the vegetable stock and potatoes. Cover and simmer gently until vegetables are tender, about 30 minutes.
3. Remove from the heat. In a food processor, puree the soup in batches until smooth. Stir cream into soup. Season to taste with salt and pepper.
4. Ladle into bowls; garnish with parsley and cheese if desired.

Spinach Feta Quiche

It never occurred to me to put feta cheese in a quiche so I'm really glad I came across this recipe. I can not wait for supper because in my fridge for warmups is ... Spinach Feta Quiche.

Oh. Yum.

Quiche always sounded so fancy-dancy and highbrow to me that I didn't try it for a long time. It's really just an egg pie with a crust; an upgraded version of an omelette. The spinach is mighty good for you (just ask Popeye) and you can't beat the protein in the eggs, especially if you're vegetarian.

This recipe comes from http://www.bbonline.com where they host various recipes of Bed & Breakfasts from all over. I will be visiting there again, I'm sure.

INGREDIENTS

1 9-inch deep dish pie crust
2 Tbsp good olive oil
3 cloves garlic, diced
1 small red onion, diced
1 16-ounce bag baby spinach, patted dry and chopped (I used what I had ... 10 ounces)
1/2 pound fresh mushrooms, cleaned and chopped
1 8-ounce package Feta cheese, crumbled
8 ounces cheddar cheese, shredded
4 eggs, beaten
1 cup whole milk
salt and pepper to taste (we forgot to add this to the eggs before cooking but didn't seem to need it later either - the Feta adds salt)

DIRECTIONS

1. Preheat oven to 375 degrees.

2. In large skillet over medium heat, saute garlic and onion in olive oil until onion is translucent. Stir in spinach and mushrooms. Cook until spinach is wilted. Drain. (Make sure it is a large skillet - the spinach cooks down but takes up a lot of room when you first add it)

3. Remove from heat, add the feta, 2 ounces of cheddar cheese, and season with salt and pepper. Spoon mixture into pie crust.

4. In medium bowl, whisk eggs and then add milk. Season with salt and pepper. Pour into pastry shell, thoroughly combining egg mixture with spinach mixture.

5. Bake in preheated oven for 15 minutes. Sprinkle top with remaining cheddar cheese (I didn't put 6 ounces of cheese on top because we're trying to cut back). Bake an additional 35 to 40 minutes or until center is set. Let cool for 10 minutes before serving (it is runny when it first comes out of the oven) or refrigerate overnight and serve at room temperature.

I didn't have a deep dish pie crust so used a regular crust and regular pie plate. The mixture came to the very top of the pie plate but the fact that it was higher than the crust didn't matter in the slightest.

I love the color of this when the cheese is all browned on top. Yum! (Sorry, no picture... we were starving!)

Chocolate Cookie Bark

I gave this Chocolate Cookie Bark as gifts to a few people, wrapped in cellophane and curly ribbon, and got several requests for the recipe. Bark is a Christmas staple for many... adding Oreo cookies to it can only be a good thing.


Bonus (if you need one beyond the Oreos): it couldn't be easier to make and the marble effect looks so impressive.


I found this recipe on the Kraft Canada site and have made it two years in a row.

INGREDIENTS

1 pkg. (8 squares) semi-sweet chocolate
1 pkg. (6 squares) white chocolate
2 Tbsp smooth peanut butter
10 Oreo cookies

DIRECTIONS
Chop Oreos into small pieces, about the size of a dime (this is my preference).
Place semi-sweet and white chocolate in separate medium microwaveable bowls. Microwave until completely melted, in short intervals (30 seconds), and stirring frequently. (I like to use a water bath instead of a microwave to avoid burning the chocolate).
Add peanut butter to the white chocolate; stir until well blended.
Drop spoonfuls of the chocolate mixtures onto a baking sheet that is covered with wax paper, alternating the colours of the chocolates. Cut through the chocolate mixtures several times with a knife for the marble effect.

Homemade Peanut Butter Cups


These are, by far, my favorite from all of the holiday treats I've made this year.

Anyone remember the two really skinny girls on Survivor that took their tops off for peanut butter and chocolate? I may have gone right along with them. Okay, maybe not ... but I do really love the combination. I go for anything Reese and I'm thinking this is about as close as anything homemade is going to get.

I got this recipe for peanut butter cups from a food blog that I have just recently started frequenting.

A note about the paper wrappers: I bought smaller wrappers than the author used so I was able to make about 48 cups where she was only able to make about 24 (I couldn't find any the size of Reese peanut butter cups). Mine were about an inch across, about the size of the miniature Reese cups.
These are a little labor intensive but so worth it in the end because they taste so good your friends and family will rave about them!
While standing in front of the chocolate chips at the grocery store, I decided to make white, dark, and milk chocolate cups. The white cups are fabulously rich! I'll list the ingredients and directions as the original author did since the addition of the different chocolates does not really change anything.

INGREDIENTS

Approx 1 1/2 cups dark chocolate, chopped, or dark chocolate chips (I decided to make white, dark, and milk chocolate cups so used about 1/2 cup of each, maybe a little more)
1/2 cup creamy peanut butter
1/2 cup crunchy peanut butter (I didn't have crunchy peanut butter so just added some finely chopped peanuts)
1/2 cup icing sugar
generous pinch of salt
1/2 tsp vanilla extract


DIRECTIONS

Set wrappers on a baking sheet.

Melt approximately half of the chocolate, using a microwave-safe bowl, and cooking it in short intervals (about 30 seconds), stirring frequently, until smooth. Use a spoon to pour a little chocolate into each wrapper. Use a small, very clean brush to paint the chocolate up the sides of each wrapper (this worked great). Alternatively, you could add extra chocolate and swirl it around, pouring out the excess later, to coat the inside of the wrapper (I found the chocolate didn't get runny enough for this to work).

Chill cups until set, about 20-30 minutes.

In a small bowl, whisk together reamining ingredients (again in short intervals, stirring frequently), until it is very, very soft. Working carefully, transfer the filling to a pastry bag (or plastic bag with the tip cut off) and pipe a generous amount of the filling into each prepared cup.

Chill again for approximately 30 minutes, or until set.

Melt the remaining chocolate and fill each cup up with chocolate. Chill until set.

Serve cold or at room temperature.

Note: So they are easier to unwrap, fill the cups up close to the top but not level to the cup paper so there is something to grab onto when unwrapping it.

Super Thick Donair Sauce

I posted this recipe on my personal blog and it still gets the most hits of any post. The words ‘donair sauce’ (or any reasonable variation) are the most common words that bring a person from a search engine to that blog. So here it is again, in its appropriate place… the food blog.

INGREDIENTS

2/3 c. Canned Sweetened Condensed Milk
1/4 c. White Vinegar
1/2 tsp. Garlic Powder

DIRECTIONS

Stir the milk and garlic powder together. Add vinegar quickly.

You will have to stir the sauce for a couple of minutes in order for the vinegar and milk to mix properly but it will come together. Let it sit for a few minutes.

As the original website says, this donair sauce will last an unnaturally long time in the refrigerator.

White Chocolate-Cranberry Biscotti

I had never made biscotti before now... but I will again. Yumm! I've only eaten biscotti a few times before so was surprised to find, when I started looking through recipes, that it is actually baked twice.

This recipe is another one from AllRecipes (submitted by Brenda Keith). It's a great recipe but I also look forward to trying it over and over again with different flavors.

INGREDIENTS

1/2 cup butter, softened
1 cup sugar
4 eggs
1 tsp vanilla extract
3 cups all purpose flour
1 Tbsp baking powder
3/4 cup dried cranberries
3/4 cup white chocolate chips (The recipe actually calls for 'white vanilla chips' ... is there such a thing? I don't know so I assumed it was a typo)

DIRECTIONS

In a mixing bowl, cream butter and sugar. Add eggs one at a time, beating well after each addition. Beat in vanilla.

Combine flour and baking powder; gradually add to creamed mixture. Stir in cranberries and white chocolate chips.

Divide dough into three portions.

On ungreased baking sheets, shape each portion into a 10-inch by 2-inch rectangle. Bake at 350 degrees for 20-25 minutes or until lightly browned. Let cool for 5 minutes.

Transfer to a cutting board. Cut diagonally with a serrated knife into 1-inch slices. Place cut side down on ungreased baking sheets. Bake for 15-20 minutes or until golden brown. Remove to wire racks to cool.

Store in an airtight container.

Yields 15 servings.

Vegetarian Shepherd's Pie

Normally, shepherd’s pie has mashed potatoes on top. Brian and I were talking a couple of nights ago and thought, “Hey… why couldn’t you put cornbread on top instead of potatoes?”. Have we gone far enough off of the sheep trail that it isn’t considered shepherd’s pie anymore? I don’t know and the result was so tasty that I’m not sure I care… I’ll debate it when I’m done eating.

My version is vegetarian and strays a bit from the recipe on the back of the packet so I included directions (the ground round is pre-cooked so really just needs to be heated). Shepherd’s pie is one of those things that you never make the same way twice … one time you might throw in carrots, the next time you don’t. It is really up to your own tastebuds and perhaps, for the less planned among us, what is in your fridge at that moment.

I could have easily found a recipe for shepherd’s pie online but I had one of those spice mixes in my pantry and it was 9 o’clock at night so I decided to go with the easy alternative this time. Free plug for them.

INGREDIENTS

1 packet Club House Shepherd’s Pie Seasoning Mix
1 package Yves Veggie Ground Round Original (or one of the flavored ones if you prefer)
2 or 3 medium carrots, sliced
1 medium yellow onion
1/2 cup frozen peas
1/2 cup corn niblets
Cornmeal

DIRECTIONS

In a saucepan, cook carrots and onion in a little bit of oil over medium-high heat, until onions are soft.

Mix the seasoning mix with 3/4 cup of water (as directed on package). Add ground round, peas, corn, and seasoning mixture to the saucepan. Lower heat to medium and cook for 5 minutes more.

Meanwhile, mix the cornbread. (I used just a regular recipe for cornbread that was on the back of the cornmeal bag. Use whatever recipe that you know works).

Pour the ground round mixture into a large casserole dish. Pour the cornbread mixture overtop. Bake in a 350 degree. All of the other ingredients are cooked at this point so we only have to worry about the cornbread. When mine was golden on top and a toothpick came out clean, I called it done.

Perfect leftovers.

Viennese Crescent Holiday Cookies


This is another one taken from AllRecipes (submitted by Debby Hawkins). I’ve always thought these cookies look really dainty and festive. I’m not sure my finished product were very attractive but they were fun to make anyway.

INGREDIENTS
2 cups all purpose flour
1 cup butter
1 cup hazelnuts, ground (I used almonds instead and ground them in my coffee grinder)
1/2 cup icing sugar, sifted
1/8 tsp salt
1 tsp vanilla
2 cups icing sugar, sifted
1 vanilla bean

DIRECTIONS

Preheat oven to 375 degrees F (190 degrees C).

In a large mixing bowl, combine flour, butter, nuts, 1/2 cup confectioners' sugar, salt, and vanilla. Hand mix until thoroughly blended. Shape dough into a ball. Cover and refrigerate for 1 hour.

Meanwhile, place sugar in a bowl or small container. With sharp chef's knife, split vanilla bean lengthwise. Scrape out seeds, and mix them into the sugar. Cut pod into 2 inch pieces and mix into sugar.

Remove dough from refrigerator and form into 1 inch balls. Roll each ball into a small roll, 3 inches long. Place rolls 2 inches apart on ungreased cookie sheet, and bend each one to make a crescent shape.

Bake 10 to 12 minutes in the preheated oven, or until set but not brown.

Let stand 1 minute, then remove from cookie sheets. Place hot cookies on a large sheet of aluminum foil. Sprinkle with prepared sugar mixture. Turn gently to coat on both sides. Cool completely and store in an airtight container at room temperature. Just before serving, coat with more vanilla flavored sugar.

Butter Cookies with Butter Icing


I enjoy decorating cookies so I always make one batch of cookies so I can do just that. This year I found a Land O Lakes recipe in a magazine called 'Best Ever Butter Cookies' so decided to give it a shot.

INGREDIENTS
1 cup butter, softened
1 cup sugar
1 egg
2 1/2 cups all purpose flour
2 Tbsp orange juice
1 Tbsp vanilla
1 tsp baking powder

DIRECTIONS
Combine butter, sugar and egg in large bowl. Beat at medium speed until creamy. Reduce speed to low; add flour, orange juice, vanilla, and baking powder. Beat until well mixed.

Divide dough into thirds; wrap each in plastic wrap. Refrigerate until firm (2 hours or overnight).

Heat oven to 400 degrees. Roll out dough on lightly foured surface to a 1/4 to 1/8 inch thickness, one third at a time (keep remaining dough refrigerated). Cut with 3-inch cookie cutters. Place 1 inch apart on ungreased cookie sheets. Bake for 6 to 10 minutes or until edges are lightly browned. Cool completely before icing.

ICING (I made peppermint frosting and tinted it four different colors)
3 cups icing sugar
1/3 cup butter, softened
1 tsp vanilla
2 to 3 Tbsp milk

Combine all ingredients except milk in small bowl. Beat at low speed, scraping bowl often and gradually adding enough milk for desired spreading consistency.

Variations: For almond frosting, add 1/2 tsp almond extract. For cocoa frosting, stir in 1/2 cup unsweetened cocoa and increase milk to 5 to 6 Tbsp. For peppermint frosting, stir in 1 tsp peppermint extract. For spice frosting, stir in 1/4 tsp ground cinnamon, 1/8 tsp ground cloves, and 1/8 tsp nutmeg.

Tip: I divided my frosting into four and colored each one differently (plain red, blue, green, and yellow). I put each into a ziploc baggie, cut a very small bit off of one corner of the bag, and used it as a piping bag. It's cheaper than a real piping bag and just as easy.

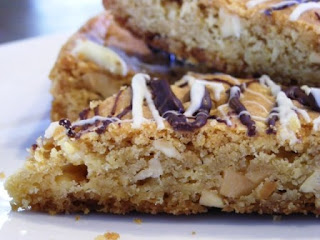
Chewy Choco-Nut Triangles

This is a Kraft recipe that I made last year and fell in love with. I can foresee this recipe becoming part of my own Christmas traditions. It's a cross between a big cookie and shortbread with peanuts and white chocolate mixed into the batter. The chocolate drizzled over the top makes it beautiful and festive and even more yummy!

INGREDIENTS
3/4 cup butter
1 1/2 cups firmly packed light brown sugar
2 eggs
1 1/2 cups flour
1 tsp baking powder
1 pkg (6 squares) white chocolate, divided
1 cup salted peanuts, coarsely chopped
1 square semi-sweet chocolate

DIRECTIONS
Preheat oven to 350 degrees. Line a 13 x 9 baking pan with foil or parchment paper, with ends extending over sides of pan. Spray foil/paper with cooking spray; set aside.

Beat butter and brown sugar until light and fluffy. Blend in eggs, flour and baking powder. Chop 5 squares of the white chocolate; stir into batter with peanuts. Spread into prepared pan.

Bake 20 to 25 mins or until toothpick inserted in centre comes out clean. Cool in pan. (Be careful not to overcook... two years in a row I have cooked it just a bit too much and it makes the edges crispy).

Melt remaining square of white chocolate and drizzle over baked rectangle. Melt semi-sweet chocolate and drizzle over baked rectangle. Lift from pan, using foil handles. Cut into triangles.

Stays moist and chewy for up to two weeks in a tightly sealed container or for up to a month tightly wrapped in the freezer.

Marinara Sauce (Mario Batali)

This was my first time making my own marinara sauce and I was not disappointed. This came from Serious Eats where Mario says, “I use it as a building block in lots of dishes as well as just a simple quick pasta sauce that can be transformed in a thousand ways”.

INGREDIENTS

6 Tbsp virgin olive oil
1 Spanish onion, cut into 1/4-inch dice
4 cloves of garlic, thinly sliced
4 tsp fresh thyme leaves (or 1 tsp dried)
1/2 medium carrot, finely shredded
2 x 28-oz cans of tomatoes, crushed by hand and mixed well with their juices (I bought diced tomatoes and crushed them a little more with my hands. Mario says the key is San Marzano tomatoes from Italy but I didn’t go looking for them and the sauce was still very good).
Salt, to taste

DIRECTIONS

Place oil into a large sauce pan with onions and garlic. Cook over medium heat until translucent but not brown (about 10 minutes). Add the thyme and carrot; cook 5 minutes longer.

Add the tomatoes. Bring to a boil. Lower the heat to just bubbling, stirring occasionally for 30 mins.

Season with salt to taste. Serve immediately. This sauce can also be refrigerated for up to 1 week or frozen for up to 6 months.

Chocolate-Covered Cherry Cookies

Mmm... alliteration is almost as tasty as chocolates and cherries!


I got this recipe from AllRecipes.com (submitted by Barbara Hart) while looking for Christmas recipes. This is one of nine recipes that I made this year (my new kitchen made me a little over-zealous).

INGREDIENTS

1/2 cup butter, softened
1 cup sugar
1 egg
1 1/2 tsp vanilla extract
1 1/2 cups all-purpose flour
1/2 cup cocoa
1/2 tsp salt, divided
1/4 tsp baking powder
1/4 tsp baking soda
1 10-oz jar maraschino cherries
1 cup semisweet chocolate chips
1/2 cup sweetened condensed milk
DIRECTIONS
Cream butter and sugar. Add egg and vanilla; mix well. Combine the flour, cocoa, 1/4 tsp salt, baking powder, and baking soda; gradually add to the creamed mixture.
Drain cherries, reserving 1 1/2 tsp of the juice. Pat cherries dry. Shape 1 Tbsp of dough around each cherry. Place 2 inches apart on ungreased baking sheets. (Word of Advice: these cookies don't reshape as they cook. When done, they will look exactly as they do now so shape them as you want to).
Bake at 350 degrees for 8-10 minutes or until set. Cool on wire racks.
Frosting: In a saucepan, heat chocolate chips and milk until chips are melted (I used a water bath, to be on the safe side); stir until smooth. Remove from heat. Stir in reserved cherry juice and remaining 1/4 tsp salt. Frost cookies.

These cookies are so yummy! The cherry in the center is a perfect mix with the sweet chocolate. Anyone who loves those cherry chocolates will love this cookie. I've never made a frosting with just chocolate and sweetened condensed milk but it is delicious and easy.